Building a wooden terrace: Everything about costs, construction and assembly

02.05.2023
In the meantime, there are many ways to extend your own house with a terrace. The wooden terrace is a real eye-catcher and creates a cosy area for your garden. With little to no skill, you can even build your own wooden terrace. There are a few key points to consider to ensure that the terrace is robust and durable. We will show you how the topic of "building a wooden terrace" looks in terms of costs and how you can create your own safe haven.
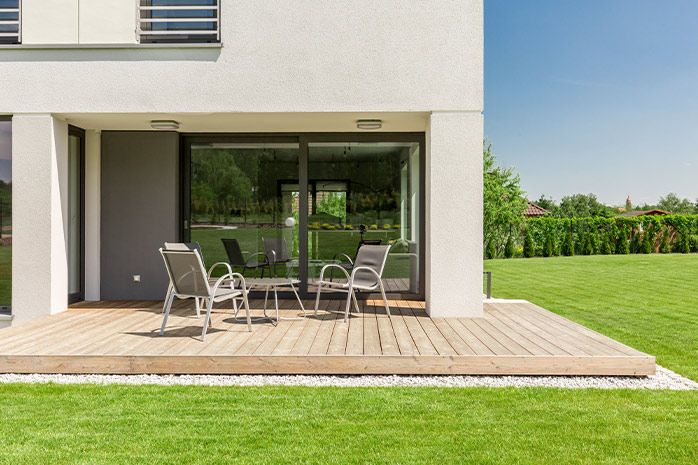
By installing a wooden deck, you enhance your garden and create space for sunbathing, barbecuing or relaxing. There are various ways to build a wooden terrace yourself. If necessary, the wooden terrace can even have steps leading to the garden. Thanks to the high degree of flexibility, you can lay the wooden decking on soil, stone or on the roof. With the right preparation and planning, there are no limits to your plans to lay a wooden terrace. With our building instructions, you can build your own wooden terrace and save money in the process.
Content
- 1 Building a wooden terrace: the cost of a wooden terrace
- 2 Construction of a wooden terrace: What do I have to consider for the substructure?
- 3 Wooden decking substructure: a construction guide
- 4 Building a wooden terrace yourself: laying the wooden planks
- 5 Laying a wooden terrace: step by step to your own terrace
- 6 Experience the best service with planeo - because you need it!
Building a wooden terrace: the cost of a wooden terrace
When you build a wooden terrace, the costs can vary greatly. On average, they range from 90-180 euros per square metre. The costs are mainly dependent on the choice of wood type. For example, a light brown larch wood costs 30 euros per square metre, while bamboo can cost up to 100 euros. In addition, the type of wood determines not only the material costs, but also the labour costs, as some types are not easy to lay. So a 20-square-metre wooden terrace would cost at least €1200.
In addition, you need a foundation and a substructure. Here, the costs for materials and assembly range between 45 and 90 euros per square metre. If the wooden terrace is built on a slope, the costs can be even higher.
This is what an example calculation might look like if you commission the construction of a 30 square metre wooden terrace made of Bangkirai:
- Load-bearing foundation: 900 €
- Substructure: 450 €
- Mounting material: 450 €
- Bangkirai decking boards: €1800
- Laying incl. cutting: € 1050
- Total: 4650 €
The costs for assembling the terrace take up a large part of the total costs, which is why it may well be worthwhile for you to build your wooden terrace yourself. Especially with more elaborate constructions such as a wooden terrace in a round shape, the labour costs of external service providers can skyrocket..
Construction of a wooden terrace: What do I have to consider for the substructure?
The most difficult part of building a wooden terrace is the substructure. This supporting structure has the goal of ensuring that the ground under the terrace does not sink in the long term and that no moisture can accumulate in the wooden terrace. This is also to prevent the growth of mould and fungi. To do this, it is important that you prepare the ground accordingly and build a foundation for your wooden terrace.
The following is important for the construction of a wooden deck with substructure:
- Foundation
- Weed fleece
- Concrete slabs or stones
- Support beam
If necessary, you can also install a frost protection layer to prevent damage to the wooden decking foundation caused by frost.
If you want to build a wooden terrace with stairs, it may well be more complex to produce a stable substructure.
Wooden decking substructure: a construction guide
When constructing a wooden terrace, the substructure can be implemented in different construction methods. The construction with concrete blocks on small foundations is recommended. This method is very inexpensive and the wood can work without any problems.
Before you start with the substructure, you can mark the planned area of the wooden terrace with wooden pegs at the corners. Use a string to mark the height of the top edge of the support beam, taking the slope into account. You can calculate the height by subtracting the thickness of the decking boards from the final height of the deck.
Then start digging foundation holes. These should be 20x20 cm and 40 cm deep. The distance should be no more than one metre from centre of the hole to centre of the hole. The holes are filled with earth-moist concrete and compacted. Once the foundations are ready, you can place a weed fleece on top. This will prevent weeds from growing through. As soon as the concrete has hardened appropriately, a layer of gravel of about 5 cm follows. This ensures that the water under the terrace quickly seeps into the ground and that the humidity does not rise too high. This increases the lifespan of the terrace considerably.
Consolidate the fleece with a concrete base stone on each wooden deck foundation. Square gutter stones known from road construction for paving are suitable for this purpose. Make sure that the individual plinth stones are the same height. If a stone deviates, you can knock it down a little with a rubber mallet or shim it with concrete to gain height. Finally, use a spirit level to check that all the plinth stones are leveled accordingly.
You can then place the support beams on top. The wooden beams should be placed on edge. Dimensions of 45x70 millimetres are suitable for this. You can place a pond liner with a smooth surface between the beams and the stone so that the stone cannot absorb moisture. This is a floating substructure, as the beams and stone are not screwed together. Alternatively, you can screw the beams to concrete slabs.
Building a wooden terrace yourself: laying the wooden planks
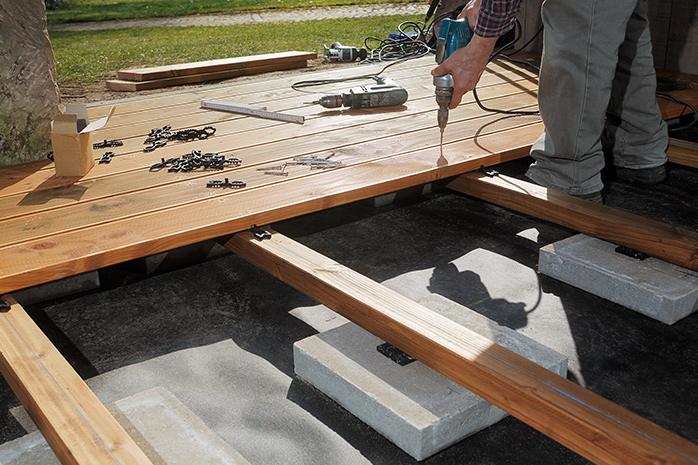
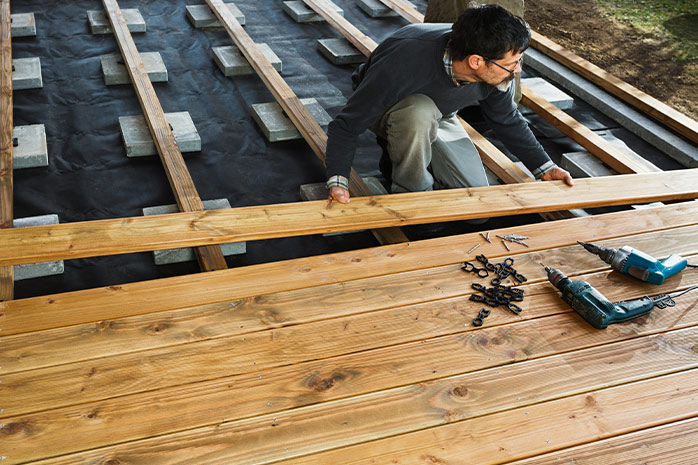
As soon as the substructure is in place, you can place the decking boards on the support beams. To do this, first lay the boards loosely on the joists. Then you can determine the position of the first board. Depending on the structure of the wooden terrace with substructure, you can lay the wooden planks either parallel or crossed.
It is important that you always guide the decking boards away from the house. At this point you can align the plank with a drilling and angle gauge and pre-drill the screw holes. Only pre-drill the holes on the planks, otherwise the screws will not sit firmly in the joist. While screwing, make sure that the heads are flush with the wood and do not protrude.
After you have fixed the first plank, you can continue with the other planks. Leave enough space between the individual planks so that no water can accumulate. As a rule of thumb, 5 millimetres is ideal.
To ensure that you can always maintain this distance, it is advisable to use plastic spacers. The slope and the joints of the wooden terrace ensure that the water runs off quickly and the wood dries without any problems. This makes your terrace last much longer.
Laying a wooden terrace: step by step to your own terrace
1. mark terrace
First, start planning the wooden terrace. You can mark the terrace area with a taut string. Place posts at the corners of the terrace and connect a mason's cord to the posts at the appropriate height. Here you can also take the slope into account so that the water can drain away.
We recommend a slope of 2% across the entire terrace. Add 20 cm to the length and width. Excavate the area so that the top edge of the boards is at the desired height under the terrace door.
2. compact and prepare the soil
Once you have excavated the area, compact it with a vibrating plate. You can then fill in 20cm of frost protection material and spread it evenly. Try to keep the surface as leveled as possible. You can then spread a 4 cm layer of paving chippings. This will help you to align the concrete slabs.
Lay peel-off gauges so that the chippings are at the correct height. The attached strings will help you to orientate yourself. In this way you can fill up with paving chippings and pull them off accordingly. Once the entire surface has been filled with chippings, you can remove the strings.
Now you can cover the entire surface with a universal fleece to protect the construction from weeds. When laying the sheets, ensure an overlap of at least 10 cm.
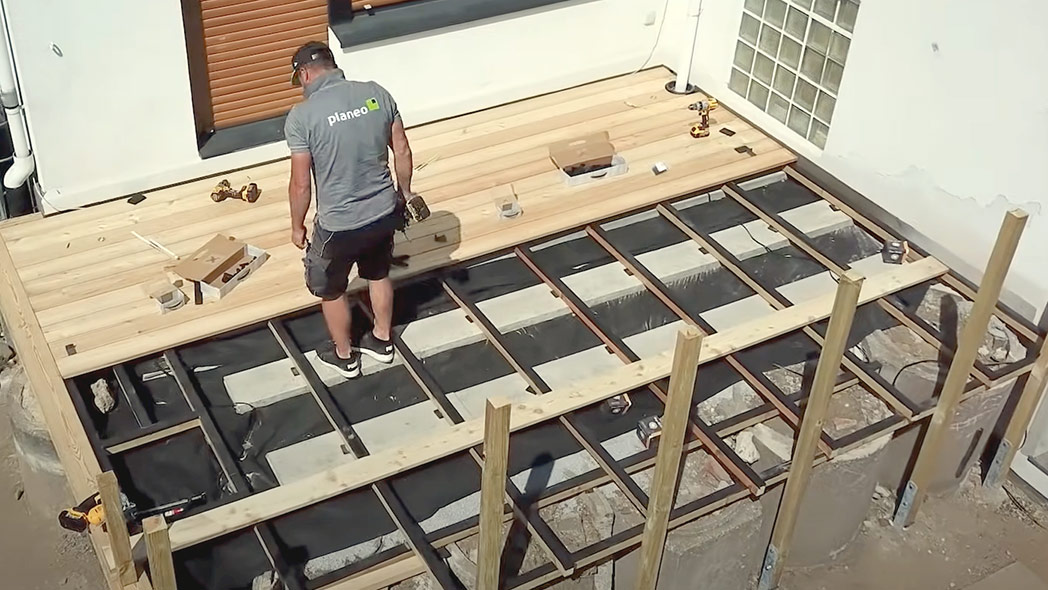
3. screw the substructure together
Once you have laid the weed fleece, you can place the concrete slabs on top. These serve as a support for the support beams. The spacing of the slab centres depends on the thickness of the substructure and the planks. You can allow for 40 to 50 cm. You can achieve even spacing with a matching board..
An underlay spar can be inserted for mounting the support beams. This serves as a spacer and increases the life span of the wood.
Now you can screw the substructure to the concrete slabs. To do this, drill through the substructure with a wood drill. Use a masonry drill to drill a dowel hole in the concrete slab. Next, you can hammer in a nail plug halfway and finish screwing it in with a cordless screwdriver.
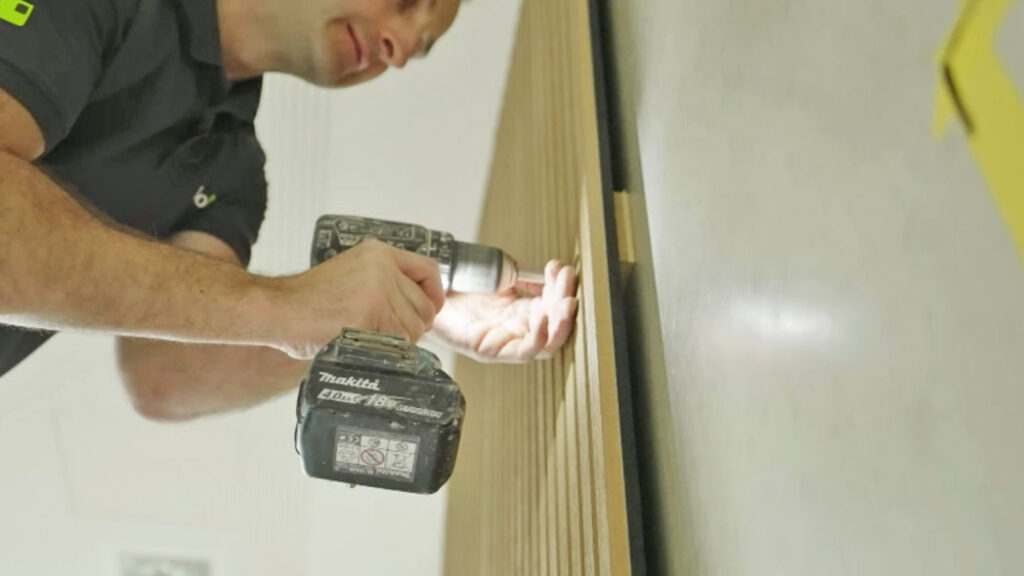
4. install wooden floorboards
Before you start screwing the planks down, pre-drill both holes on each side. When screwing the boards, take into account the width of the boards and the substructure. Install the planks with one centimetre distance to the wall. Finally, you can screw the boards together with decking screws. These are made of stainless steel and do not rust.
Pay attention to the distance between the planks. To do this, you can cut a spacer in half and place it under the outer edges. You should also keep an expansion gap at longitudinal joints. You can then begin to lay the wooden planks.
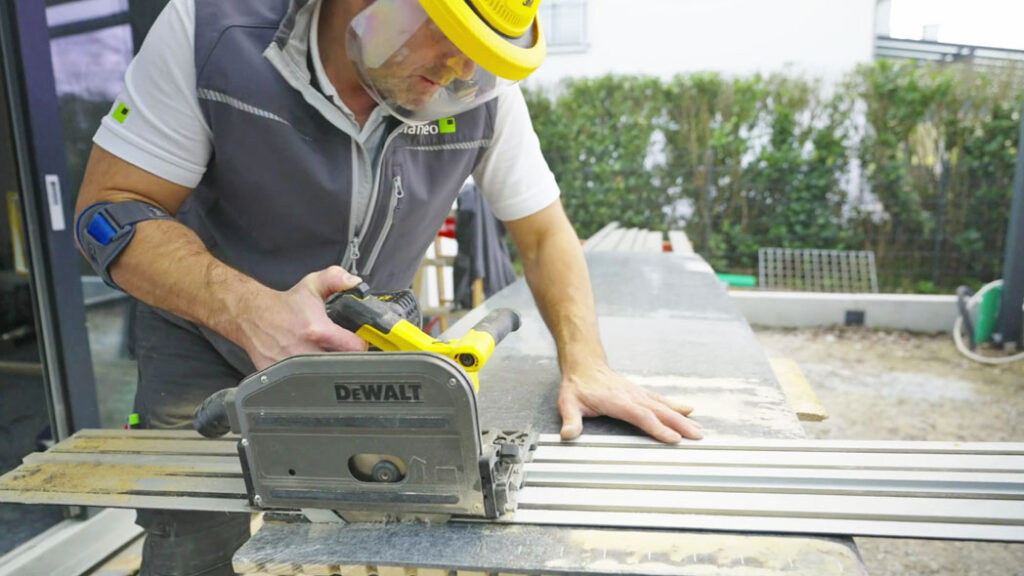
5. finish with border and veneer
You can leave the ends of the decking boards protruding. These projections can be sawn off in one piece with a hand-held circular saw after installation. The cut edge is then sanded. For the wooden terrace edging, you can install perimeter terrace boards.
Veneering is done from the top through the substructure or directly into the substructure from the side. This depends on the running direction of the construction. After installing the facing boards, observe that there is still sufficient air circulation.
To finish the wooden decking, you can seal the end-grain areas (cut edges) of the decking boards with a protective coating. These areas are constantly exposed to the weather and are sensitive to moisture.
Experience the best service with planeo - because you need it!
No matter what challenges you face with your project, planeo provides you with the right solution. Benefit from the advantages of our services:
- Free sample⁴ for many of our products: Order samples free of charge, e.g. of our wooden decking or WPC decking.
- Free storage³ - for several months and delivery on the date of your choice.
- Professional advice until 5pm¹ - We offer professional advice on 05222 9604810 or answer your questions directly in the comments.