Choose Shipping Country

planeo Lacquer interior door Lacquer 2.0 - Liberto 9016 White lacquer

High-quality interior door with rounded edge - brushed metal pilaster strips in milled grooves on tubular planks - white lacquer finish

› Technical Details
item no. T-libe-L9016
Weight 18,000  kg

Request a quote now

planeo

Your delivery date: until Wednesday 26. June

  • Customer service until 6pm¹ - personal & close
  • DIY Videos - DIY instructions
1
2
3

We just need your E-Mail and shipping address.

Feel free to add more samples to your sample cart afterwards.

1
2

You want to redesign your home? Get inspiration with our high quality original floorboards! Order your premium sample package now and experience the quality of our products up close.

  • Shipped with their original measurements
  • Per article only one original floorboard is possible.
  • Delivery time: within three days after receipt of payment.
  • With voucher code for the next online order.

Order now Premium-Sample package!

Premium sampleprice:
/board

Description

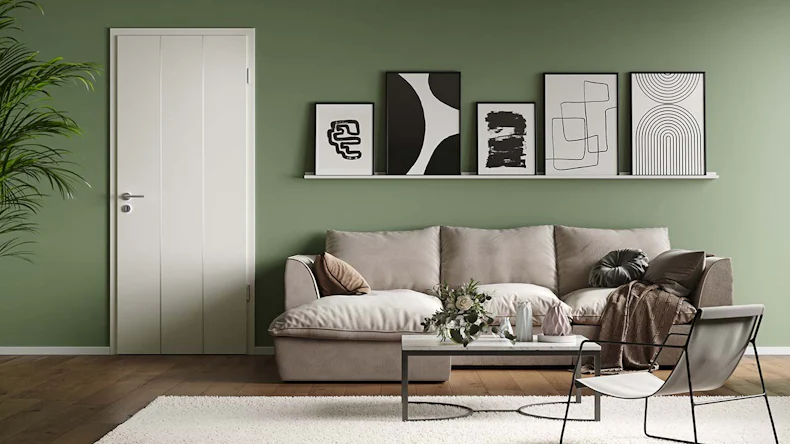
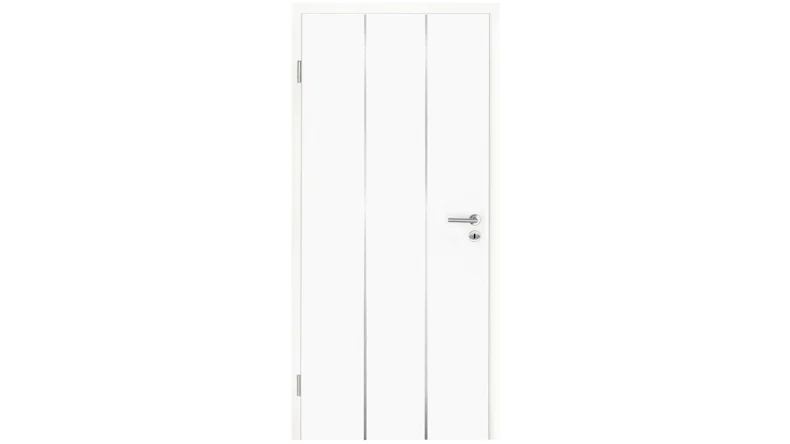
Special design highlight with high-quality workmanship. With inlaid stainless steel pilaster strips running across the door leaf, your interior doors become a visual eye-catcher in your home.

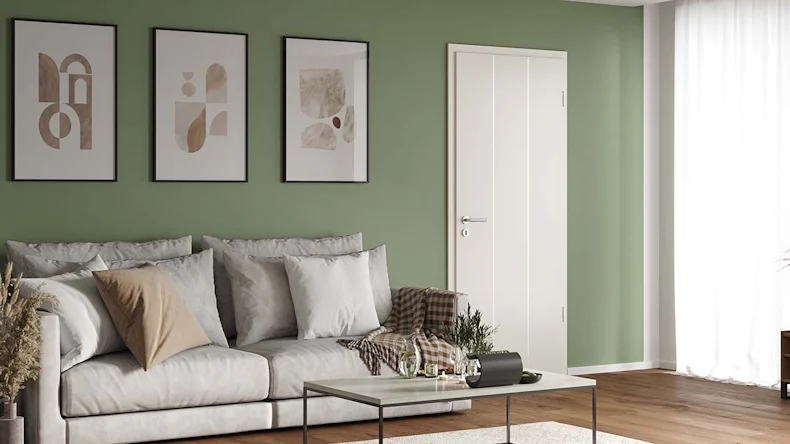
The combination of a high-quality white lacquer surface together with stainless steel-look pilaster strips give your interior a modern look. Solid stability is provided by the tubular chipboard as the middle layer.

Features:

  • modern design
  • centre layer made of tubular chipboard
  • Inlaid pilaster strips in stainless steel
  • Elaborate lacquering process
  • Door leaf thickness of approx. 40 mm
  • three-sided rebated door leaf according to DIN 13 x 25.5 mm
  • rounded door edges - impact-resistant and robust

Included as standard

  • 2 2-piece nickel-plated drill-in hinges V 0026
  • Bunt beard lock- 55 mm backset, 72 mm distance, forend 20 mm silver-coloured

Optional to order:

    WC lock - 55 mm thorn, 78 mm distance, forend 24 mm silver-coloured

planeo is the brand for professional solutions with tested quality. In our extensive range, you will find first-class products for home and garden, from floors to wall coverings to decking: we offer you suitable items with a top price-performance ratio for almost every requirement and budget. We also have product lines such as carpets, wall paints, wallpapers and doors. The range of attractive offers for walls, floors and patios is rounded out by high-quality accessories and effective cleaning and maintenance products. Meanwhile, planeo's services go beyond the trade in floor coverings. We put great emphasis on the idea of service in everything we do. We deal with the topics of material, handling and realisation in such detail that we can provide you with an adequate solution for many different situations on the building site. To make things more clear, you can find useful tips and instructions in our guides with articles and videos. Beautiful flooring and more? Realise easily with planeo.


Technical Details
item no. T-libe-L9016
Collection Lack 2.0
Colour white
Deck board HDF-Platte
EAN 4062212192689
Floor seal ohne Bodendichtung
Frame MDF
Hinge 2-teilig (Standard)
Join DIN 25,5x13 mm
Lacquer structure 3-Schicht-Spritzlackaufbau
Lacquer | Surface White lacquer 9016
Light cut-out ohne LA
Lock faceplate Stulp 20mm silberfarbig
Look solid colour
Manufacturer planeo
Middle position Röhrenspanplatte
Piece per package 1
Shipping group L
Style Modern
Type Interior door
Weight 18,00 kg/Packing
Package Content 1 Pc
Show all data ▼
 
Downloads
planeo timber lining frames - Instructions

We will help you with your questions!


A specialist adviser will be happy
to advise you personally.


☎ +41 41 226 56 00
Mon - Fri: 9am - 6pm
Sat: 9am - 2pm

Product questions

Door assembly instructions

Variant: DIY instructions

button
1. Measure the door

The first step is to acquire accurate measurements in order to order the correct door. Check the wall's level using a spirit level. Begin by determining the height from the floor. Then, in the finished state (with plaster and covering), measure the wall thickness at three points: top, middle, and bottom. Apply the same logic to the other side. Finally, the width of the door is measured at all three places. Determine the door hinge once the measurements have been determined and noted.

ATTENTION: If the floor has not yet been constructed, add the construction height of the floor to the measurement to ensure that the door is the correct height. When measuring the breadth, the width of the tiles on the wall is also considered.

button
2. Acclimatisation & preparation

The door and all other components should be stored horizontally in the packs in the room where they will be assembled for at least 48 hours before assembly. This allows the material to adjust to ambient temperature and reduces the amount of "labour" required after installing. Before processing, arrange the components. Open the packages carefully so that the cutter knife does not damage the door/frame.

Before laying, the official assembly instructions provided in each item must be followed, or any warranty and guarantee claims will be null and invalid!

button
3. Mount the frame

To assemble the frame together, first glue and screw the various pieces together. Connect the two frame components by placing the wooden plates into the joints after applying adhesive to the mitred surfaces of the longitudinal and transverse linings. Insert the connector into the hole in the frame and tighten it with a screwdriver. Metal clips are then used to secure the elements. A wet cloth can be used to remove excess glue. This is then done on the opposite side. The structure is then installed around 3 mm above the floor to protect it from moisture (e.g. cleaning water). As soon as it is in position, use a frame clamp to align it and foam it using 2-component foam. The clamps can be removed after curing. The ornamental cladding is now fixed and in place.

Tip: As an alternative to the clamps, you can also work with wedges and wooden slats.

button
4. Hang the door

You can hang the door after installing the frame and ornamental panel and inserting the hinges. Install the hinges. Remove the door's storage feet and hang it on the hinges provided.

button
5. Mount handles

The door handles are finally installed. Drill holes for the door handles using the provided drilling pattern. On both sides, drill a rough fray. The fittings are then carefully inserted and assembled. Finally, insert the plunger and install the ornamental panel.

To make your own, you will need this

Material:

  • Door
  • Frame
  • Hinge V4400 (for doors with 3-part hinge)
  • Handle set
  • Glue
  • 2-component assembly foam

Tools:

  • Door clamp
  • Cordless screwdriver
  • Hammer
  • Hex key
  • Spirit level
  • Screwdriver
Helpful Videos

Measuring interior doors correctly

Installing the interior door guide

Installing the CPL door

How to install a room door

Individual offer?

Are you looking for a lower price? Just ask us for an individual offer!

Inquery

We use your data exclusively for contacting you and processing your request. By sending the contact form you agree that your data will be stored and processed electronically for possible queries. We will not pass on your data to third parties. You can withdraw your consent at any time with effect for the future. Please note our data protection declaration.

* Required Fields

Inquery

We use your data exclusively to contact you and process your request and, if necessary, to prepare an offer. By sending the contact form you agree that your data will be stored and processed electronically for possible queries. We do not pass on your data to third parties. You can withdraw your consent at any time with effect for the future. Please note our data protection declaration.

* Required Fields