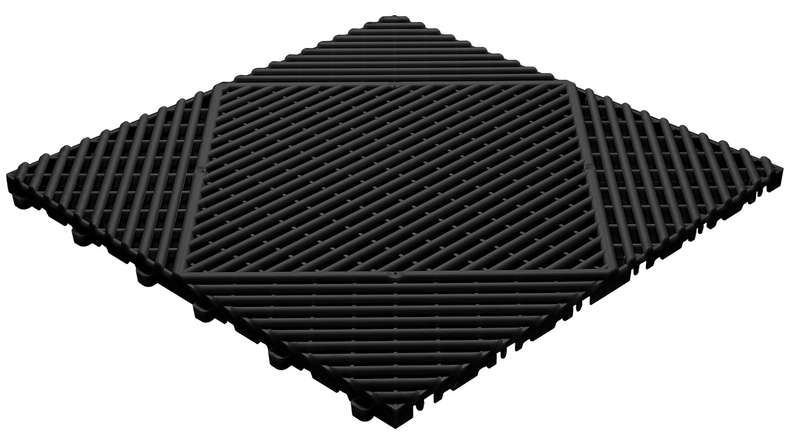
planeo click tile Classic - black
pflegeleichte und langlebige Terrassenfliese für den Außenbereich
Item no.:
TF70303

Scope of delivery: 6 pcs / package = 0.96m²
Desired quantity = required m² / package quantity
Ex:7.2m² area / 0.96m² = 8 packages
Scope of delivery: 6 pcs / package = 0.96m²
Desired quantity = required m² / package quantity
Ex:7.2m² area / 0.96m² = 8 packages
To ensure easy and clean installation, the subfloor should be firm and level !
| item no. | TF70303 |
|---|---|
| Manufacturer | planeo |
| Length in mm | 400 |
| Width in mm | 400 |
| Thickness in mm | 18 |
| Type | Terrace tile |
| suitable for | Terrace, Balcony |
| Material | Plastic |
| Installation type | click |
| EAN | 4062212059500 |
| Piece per package | 6 |
| Shipping group | S |
| Weight | 3.90 kg / Packing |
| Frost resistance | 0 |
| Package Content | 1 Package |
MO - FR 8am to 5pm
SA 9am to 2pm
Copyright © 2026 Planeo - All rights reserved -
v2.161.0
All prices incl. VAT plus shipping costs
1 We are available by phone from Monday to Friday from 8 a.m. to 5 p.m. and Saturday from 9 a.m. to 2 p.m. 2 For express delivery service, there is a charge of 10 euros; for the package and 50 euros; for the shipping deliveries. Express delivery is only possible within mainland Germany and only if all products in the shopping basket are ready for express delivery. In addition, notification by the delivery service is omitted. 4 The sample service includes up to 5 product samples and is free of charge for the delivery areas: Germany, Europe 1 and 2. You can see the availability of the sample by clicking on the « sample » button on the product page. 5 The voucher is valid from an order value of 149 euros;. Multiple voucher promotions cannot be combined with each other.* While stocks last.