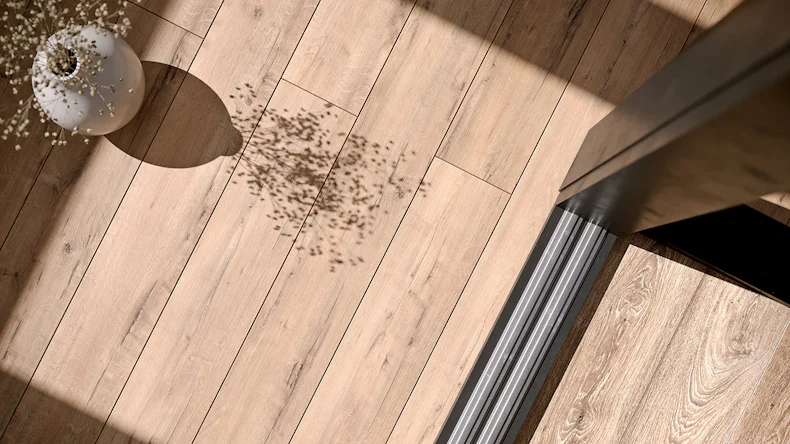
We just need your E-Mail and shipping address.
Feel free to add more samples to your sample cart afterwards.
- structured surface TitanBoard HPL decking board oak naturo is embossed with an authentic wood structure, which creates a noble appearance and ensures a safe non-slip tread even when wet.
- abrasion and scratch resistant The highly compressed and laminated HPL is extremely robust and resistant. HPL has been used for years in interior and exterior construction for heavily used areas and is therefore ideal for terraces.
- waterproof, UV-stable, stain-resistant Household liquids cannot penetrate the surface and cause stains. The material composition of HPL is 100% waterproof and extremely UV-resistant.
- easy-care and water-resistant The HPL decking boards are easy to clean with water and a brush. The water can run off or evaporate thanks to the sufficient distance to the subfloor on a downward slope.
To ensure easy and clean installation, the subfloor should be firm, level, load-bearing, frost-proof and free of vegetation!
We recommend using diamond saw blades for cutting the planks with cross-cut or panel saws.
planeo is the brand for professional solutions with tested quality. In our extensive range, you will find first-class products for home and garden, from floors to wall coverings to decking: we offer you suitable items with a top price-performance ratio for almost every requirement and budget. We also have product lines such as carpets, wall paints, wallpapers and doors. The range of attractive offers for walls, floors and patios is rounded out by high-quality accessories and effective cleaning and maintenance products. Meanwhile, planeo's services go beyond the trade in floor coverings.
We put great emphasis on the idea of service in everything we do. We deal with the topics of material, handling and realisation in such detail that we can provide you with an adequate solution for many different situations on the building site. To make things more clear, you can find useful tips and instructions in our guides with articles and videos. Beautiful flooring and more? Realise easily with planeo.
item no. | HPL-RT1566-ENA |
---|---|
Manufacturer | planeo |
Plank length | 3.05 |
Length in mm | 3050 |
Width in mm | 200 |
Thickness in mm | 10 |
Material | WPC / BPC |
Special features | HPL |
EAN | 4062212167489 |
Collection | TitanBoard |
Piece per package | 1 |
Profiles | Solid plank |
Shipping group | XL |
Style | Eiche |
suitable for | Terrace, Garden |
Colour | grey |
Weight | 10,25 kg/Packing |
Package Content | 3.05 rm |
Show all data ▼
|
|
Downloads |
We will help you with your questions!
A specialist adviser will be happy
to advise you personally.
☎ +49 5222 960 4810
Mon - Fri: 9am - 6pm
Sat: 9am - 2pm
Variant: DIY-Instruction

First, determine the total construction height of the WPC decking boards installed. The terrace construction consists of the substructure (chippings, weed fleece, lawn edges) and the terrace construction (terrace pad, substructure, WPC plank). Check whether the existing edges of the old terrace can be used for the necessary height. Tighten cords to be able to measure the heights. Also, take into account the slope of 2% away from the house.

Spread chippings roughly on the compacted gravel with a wheelbarrow and shovel. Level the surface with a spirit level on two long metal rods embedded in the chippings. Check the required construction height and slope with at least two taut cords. Start in one corner and work down the entire surface in rows.

First, roll out a sheet of weed fleece starting from the outer edge. Place the curbs on the weed fleece with a 2 cm gap to the edge of the patio. Then lay the lawn edges on top. Please note that the distance between the lawn edges should be approx. 30-40 cm.
Helpful hint: A homemade template can serve as a spacer and make it easier to lay the subsequent lawn edges on the fleece.

Unroll the sheets of weed fleece and weigh the fleece down with the substructure so that it stays in place even in windy conditions.

The aluminium substructure is distributed over the surface and cut to the specified position. Connectors can be used to save on waste and to ensure that the substructure is laid without offsets. The aluminium substructure is screwed to the connector and laid at a maximum distance of 35 cm from the existing substructure.
If the terrace is laid on an existing subfloor, there may be slight unevenness in the subfloor after a few years. In this case, determine the highest point of the substructure and screw it in place. Then level out the unevenness with rubber pads by attaching a cord from both sides of the substructure and using it for orientation.
ATTENTION: Please note that edge distances between the substructure and other objects of approx. 20 mm must be maintained.

Now the board joints are planned on the substructure, the substructure must also be doweled in this area. All other substructures are only aligned and doweled to the floor at the ends to stabilise the structure.

Pull a cord over the aluminium substructure to level the surface. The substructures can then be leveled with the help of rubber pads. Once the substructures are level, clean them before installing the HPL planks.

Before laying, it is imperative to follow the official laying instructions that are included in each package, otherwise, any claim to warranty and guarantee will be invalidated!
When laying the planks, 20 mm edge distances must be observed. Lay the plank well aligned on the substructure. The substructure should run against the direction in which the planks are laid. Mark the course of the plank with a white pencil and fix the installation tape and adhesive up to the marked point on the substructure. Then the plank can be fixed in place. The mounting tape is used to fix the plank until the adhesive sets and the substructure is bonded to the plank. Aluminium T spacers can be used to ensure that the planks are evenly spaced.

Plan and mark all lamp positions, if the lighting is desired. Then unroll the cable. Strip the cable with the caps supplied. Install the lamps at the same time as you lay the planks. To do this, drill the appropriate holes and bring the connectors into contact with the laid-out cable. Finally, clamp the cable to the transformer and position it in the floor tank or near a socket. Use a safebox if the socket is in the ground.
Helpful hint: Check the function of the lamps immediately after installation.
What you need to make it yourself
Material:
- HPL decking board
- Substructure Terrace
- Terrace pads
- EPDM tape
- Mounting adhesive
- Stainless steel screws
optional:
- Weed fleece
- End strips
- LED lights
- Curbstones
- Garden and landscaping concrete
- Crushed stone/ frost protection material
- Paving chippings
- Concrete slabs
- Drainage channel
Tools:
- Cordless screwdriver
- Spirit level
- Folding rule
- Chop saw
- Cord nails / iron rods
- Hearing protection & safety goggles
- Protective gloves
optional:
- Impact drill
- Angle grinder
- Masking tape
- Mortar bucket
- Spade
- Wheelbarrow
- Shovel
- Aluminium straightedge/puller rods
- Agitator
- Mason's cord
- Vibrating plate
- Sledgehammer
Working time:
- up to 50 hours per 20 m² terrace area
Level of difficulty:
- medium
Individual offer?
Are you looking for a lower price? Just ask us for an individual offer!